Tuesday, September 6, 2011

The scary world of dehydration. . .

So this last weekend Meredith and I decided to continue improving on our preserving prowess and we canned more tomato sauce.  We ordered the organic "seconds" (bruised and split) tomatoes from Soil Born farms (they ended up being beautiful unblemished masterpieces of organic goodness and not bruised at all, for a whopping 50 cents a pound!  So with 60 pounds in total and an array of other goodies we headed home to her house in Amador.  Luckily she has a great brick patio with some shade and we set up our big cooking operation from the previous weekend.  The one big difference is that we had decided to try our hand at dehydrating fruits and veggies as well.
  Our friends and family graciously donated their dehydrators for our venture and I had visions of dried soup mixes and scrumptious dehydrated fruit snacks dancing in my head.  We took the Ball Blue Book and a guide, "How to Dehydrate Food" as our bibles and compared the two recipes.  Through the comparison we came up with our game plan of what fruits and veggies we needed to pretreat in citric acid, how thick we cut them and at what temperature the dehydrator should be set.  What we found was not all fruit and veggies are created equal and what a P.I.T.A some of them were!
  Apples, pears, strawberries, and figs were the easiest and seemed to come out the most uniform (all but the figs were pretreated with citric acid).  White peaches were AMAZING dried but quite a bit of work with blanching, peeling, pitting and slicing.  Grapes, blueberries and cherries - while amazing tasting - were too messy, too time consuming to prep and took WAY too long to dehydrate.  I'll buy my raisins at the grocer in the future.

   The plan for the fruit is to make homemade trail mix.  This is something I used to do all the time in Italy before our long bus rides every weekend with my architecture class.  My roommate and I would venture down to the Mercato Nuovo and visit our favorite dried fruit vendor - he had EVERYTHING!  Our favorites being dried mango and pineapple.  Then we would head over to get a bag full of almonds and walnuts with some chocolate candies.  Our DIY trail mix would sustain us on those long bus rides from city to city.  Today I went to Whole Foods and stocked up on raw nuts and semi-sweet chocolate chips from the dry foods bins and once my homemade dried fruit is done conditioning after a week it will all get put into individual snack size food-saver bags!
  For the homemade dried veggies, less pretreating was necessary and they came out fairly uniform.  Green beans, okra, onions, peppers and corn came out great.  Carrots were too much work and do not retain much of their nutrition or flavor after drying so those are nixed for my future dehydrating endeavors.  Meredith and my greatest find, however, were dried zucchini!  We ended up slicing a lot of Mer's extra zucchini from her garden and seasoning it with a garlic seasoning mix.  When dehydrated zucchini becomes crispy and with seasoning easily takes the place of a chip - flavorful, crunchy, no fatty oils and raw so it retains all the nutrients!  Just remember to go light on the seasoning because the "chips" are much smaller after dehydration which compounds the spice flavor!

10 medium zucchini sliced 1/4 inch with garlic salt, pepper, and onion powder.

10    pounds   of   zucchini   equals   a   quarter   pound   of   zucchini    chips!

Thursday, September 1, 2011

Bloody Mary Mix (Alcoholic or Non)

This recipe is the one I used last weekend for canning but it will probably stay in the fridge for a week or more and would freeze excellently (just add the vodka before pouring yourself a glass otherwise it won't freeze). 

Makes: 5 quarts - 20, 8 oz. servings

Ingredients:
  - 30 medium tomatoes, peeled, seeded, decored and quartered
  - 2 1/2 cups green peppers, chopped
  - 1 3/4 cups carrots, diced
  - 1 cup celery, diced
  - 1 small onion, diced
  - 4-6 garlic cloves, minced
  - 1 Serrano pepper, seeded and minced (optional)
  - 1/4 cup parsley, minced
  - 1 bay leaf
  - 1/4 cup sugar
  - 1/4 cup fresh squeezed lemon juice
  - 2 tbsp salt
  - 1 1/2 tbsp Worcestershire
  - 1/2 tbsp Tabasco or to taste (I added about 3 tbsp)

  To peel the tomatoes slice the skin of the tomato after washing and drop in boiling water for 1 minute or until skin becomes wrinkly, remove and drop in an ice bath.  When cool the skin will peel right off and then just core and cut in quarters and push seeds out with your thumbs.
  Cook the ingredients from the tomatoes to the parsley in a large pot until mushy - it will quickly become soupy - cook for 30 to 45 minutes, until veggies become softer.  Remove the bay leaf and working in batches, place the contents of the pot in a blender and puree to a desired consistency for drinking.  Return blender mixture to the pot and add the remaining ingredients.  Taste for seasoning and spiciness.  Bring this to a boil and either can the contents, place in a refrigerator container for immediate enjoyment or store in freezer safe containers for later.  If canning place in sterilized quart jars and water bath can for 40 minutes.
  Add the desired amount of vodka (or not) to mixture and place in shaker with ice, shake vigorously, pour chilled mixture into a glass with ice and pickled garnish or celery stick.  It's great with brunch or as an afternoon treat before dinner!

Tuesday, August 30, 2011

Fun at the farm. . .

So this post is going to be less about ways to eat and live better and more about how much fun I had last weekend at the farm where our CSA  box comes from.  Every year, as a thank you to being a farm member, Eatwell hosts two tomato saucing parties.  They invite whoever wants to come out to turn 1800 pounds of tomatoes (roma, heirloom, beefsteak, etc) into whatever wonderful concoctions you can dream up - for free.  All you have to bring is the propane stove, your utensils for cooking, chopping and blending and your jars - they supply the tomatoes, onions, peppers, basil, water and pressure canners as well as the spacious hoop houses with lots of tables.


The hoop houses where the canning is set up.

  This year was my first year and my sister Meredith came out with me to be my sous chef.  I wasn't really sure how much I would get canned but I was hopeful it would be a lot (I bought 48 quart jars which ended up being a little too ambitious). Meredith and I arrived at the farm 30 minutes early to make sure we had a prime spot, unloaded our turkey fryer, dual propane stove, two coolers, blender, pots, cutting boards and 2 five gallon propane tanks and got things hooked up and ready to go.  Within an hour of arriving, a wonderful concoction of freshly picked tomatoes was boiling away on our stove and the turkey fryer water was heating up ready to sterilize jars.

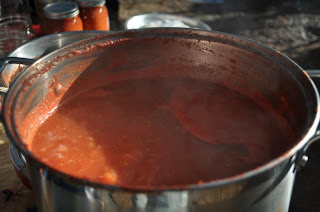
The sauce just after coming to a boil - the foam boils away after an hour or so and it reduces by about a 1/3 before it's ready for canning.
The recipes that I had spent hours looking for on the internet were the easiest and the most flavorful I  could find.  Making tomato sauce had previously been a little off-putting to me because it is so much work - boiling the tomatos, putting them in an ice bath, peeling the skin off, slicing, decoring, deseeding, draining and then boiling down before processing in jars.  I found a great recipe online that said to just wash your tomatoes, slice them in quarters, remove the stem and blend to a liquid consistancy then just boil it for 2.5 hours until it is at the thickness you want and then can for 25 minutes in a boiling water bath canner.  That was a lot less work in my opinion and the added bonus is that not peeling off the skins adds more nutrients to the sauce.  By blending it all up together the pulp, skins and seeds all become one texture and no one would no the difference unless you told them. 


Meredith blending up the tomatoes for the sauce.
  The long part of the process is waiting for it to boil down so while we had our first pot of tomato sauce boiling away we decided to prep the tomatoes and other ingredients for our bloody mary mix.  Unfortunately the recipe I found for bloody mary mix called for peeled, cored and deseeded tomatoes, so Mer and I promptly set in to blanching, cutting and peeling 60 tomatoes.  It was a messy repetitive job but it helped pass the time as we waited for things to cook.  Added to the tomatoes were onions, parsley, worcestshire, tabasco, serrano peppers, celery and carrots.  After all this cooks down for 45 minutes you blend it all up, return it to the pot, check for seasoning and spice, bring to a boil and can in a water bath canner for 40 minutes.  You can drink it with or without alcohol and my little taste test before canning told me it was going to be pretty darn good!

The first batch to come out of the canner.
  We cooked and canned from 10:30 am to about 9:30 pm.  We got 13 quart jars of sauce made and 11 jars of bloody mary mix, plus we made a great meat ragu to share with everyone that night at dinner.  Mer and I learned some valuable lessons that will only help us to be more efficient and organized next year.  We know that we definitely need at least one more pair of hands and an extra turkey fryer wouldn't hurt either.  Eventhough it was a lot of work, we found ourselves planning to do it again before the season is over - perhaps in Mer's backyard.  We would just need to find a cheap supplier of organic tomatoes in large quantities.  Perhaps I'll call Eatwell this week and see if I can get a few more crates of tomatoes and do some more canning this weekend.
  Once you start canning it quickly becomes an addiction!  I encourage everyone to try it out at least once - it makes for great presents at the holidays and what better way to preserve the fresh taste of summer all year round!

Wednesday, August 24, 2011

Lemon Fusilli Pasta

This is another great recipe from Ina Garten - it's fulfilling in that it cures your carb craving but uses great fresh ingredients like cherry tomatoes, which are especially wonderful this time of year. It's great served hot or room temperature!

Serves:  4 to 5

Ingredients:
  - 1 tbsp olive oil
  - 1 tbsp minced garlic (I usually double this)
  - 2 cups heavy whipping cream
  - 3 lemons (with good clean rinds)
  - 1 lb dried fusilli pasta
  - 1/2 lb baby arugula (or 2 bunches common arugula - the more arugula grows the more bitter it gets)
  - 1/2 cup freshly grated paremsan
  - 1 pint cherry tomatoes, halved

Heat the olive oil in a medium saucepan over medium heat, add the garlic, and cook for 60 seconds. Add the cream, the zest from 2 lemons, the juice of 2 lemons, 2 teaspoons of salt, and 1 teaspoon of pepper. Bring to a boil, then lower the heat and simmer for 15 to 20 minutes, until it starts to thicken.

Bring a large pot of water to a boil, add 1 tablespoon of salt and the pasta, and cook according to the directions on the package, about 12 minutes, stirring occasionally. Drain the pasta in a colander and place it back into the pot. Immediately add the cream mixture and cook it over medium-low heat for 3 minutes, until most of the sauce has been absorbed in the pasta. Pour the hot pasta into a large bowl, add the arugula, Parmesan, and tomatoes. Toss well, season to taste, and serve hot

Monday, August 22, 2011

But I Don't Have Enough Time!

I know there are skeptics and naysayers out there in regards to my "localvore" way of eating and feeding my family because of the amount of time everyone thinks it takes.  The key to successful healthy eating is organization and planning.  For those of you with desk jobs or the usual 9-5 work day there is almost always a few minutes a day - whether it be a 15 minute coffee break or a few minutes on your lunch break where you can sit down and write up a menu for the coming week's meals.  I try to divide my list into each day with lunch and dinner listed (breakfast is usually the same every morning); I find it also very helpful to plan to cook a large casserole or pot of soup at least once a week so that it can be used for leftovers and that way I don't have to cook some of the nights.  If you're short on time during the work week but have an extra hour or two on the weekends when you're fixing dinner try to prep or make another of your meals ahead of time and freeze it or have it ready to be thrown together in a few minutes. When I'm preparing something in advance I try to double or triple the recipe and freeze the extra portions to stock up the freezer for those nights I'm in a pinch and don't feel like cooking.
  When grocery shopping, in order to make your trip the fastest possible, organize your shopping list into the appropriate food areas in your grocery store (i.e. produce, meat, dry goods, dairy, etc).  Think about the way you travel through the store and list the different categories in that order.  This little bit of organization ahead of time can save you lots of time from running back and forth across the store trying to find the last few items on your list.  To make your trip even faster, shop with another adult or teenager in your household and give them half the list!
  My previous blogposts mentioned going to farmer's markets on the weekends to stock up on produce and other local goods and you may be telling yourself "the hell with getting up early in the morning on the weekend to go produce shopping!"  There are some other great benefits other than just picking up some local fruit and veggies, however.  Many farmer's markets have ready made meals all prepackaged and ready for purchase like homemade pasta and pasta sauces, baked artisan breads with toppings baked in that are great for do-it-yourself pizzas and ready made desserts.  A lot of food vendors have set-up shop at their local farmer's market as well, so it's a good place to get breakfast and that takes one more meal off your list that you have to prepare.
  I find it very refreshing to get up and grab a cup of coffee or tea at the market, walk around with James and see what looks good, and take the dog out for a long walk.  Getting up and doing something on the weekend also helps me be more productive the rest of the day.  I find I get a lot more done when I get up and be productive right-off-the-bat versus lounging around the house with my cup of tea.  Farmer's markets are also a great place to take the kids - it gives them a place to run around, interact with people and learn about the different things that farmer's grow in their area as well as expand their food palette.
  Hopefully these tips help you out with your busy schedules and allow you to more easily prepare healthy meals for you and your family!  Bon appetite!

Sunday, August 21, 2011

Pickled Garlic

This was my first venture into canning and it turned out pretty well - the inspiration came from a farm outside DC where they have an annual corn maze and farmer's market with lots of canned jelly's and veggies.  Great for a snack with drinks or as a garnish in savory drinks like bloody mary's!


Makes 3 pint jars.

Ingredients:
  - 14 heads of unblemished garlic (blanch in boiling water for 1 minute and then place in cold ice bath to easily peel the skins off without damaging the cloves)
  - 3 cups of 5% white vinegar
  - 2 tbsp pickling/kosher salt
  -  1 cup sugar
  - sliced spicy peppers (jalapeno, serrano, wax, etc.) optional

  Boil the garlic in vinegar, salt and sugar mixture for 1 minute then place the garlic in the 3 sterilized pint jars to 3/4" below the rim.  Pour the solution over the garlic to 1/2" below the rim and wipe rim clean.  Place hot lids and rings on top and boil in a water bath canner for 20 minutes.  Remove and let stand for 24 hours before moving.  If top lid is sucked down and does not "pop" then canning was successful and they should stay in a dark cupboard for over a year.  Enjoy!

Thursday, August 18, 2011

Preserving summer's bounty. . .

It's that time of the year when more wonderful things are coming out of your garden, your local farmer's market or CSA than you could ever possibly eat!  The summer harvest is coming in with all kinds of peppers, tomatoes, squash, potatoes, corn, beans and fruit and they are in desperate need of saving before they go bad.  There are a few options on what someone can do to save the summer bounty for use in the more desolate months - some options are better than others in terms of nutrient value and flavor but all are a good idea.  Your four options are:  eat now, blanch and freeze, dehydrating or canning - in descending order of nutrient value!
  Since I don't have a yard or even many indoor vegetable plants, I spend a couple hours on my Saturday mornings (now that I'm working) at the San Ramon farmer's market.  It's about a 40 vendor market with a variety of meats, cheese, pasta, ice creams, food stalls and of course the fruit and vegetable vendors.  I'm always looking for whatever vegetables look best that week and what would be good to save for the winter, as well as whatever I need for dinner and lunches that week.  So far this year I've been on a bit of a canning spree and haven't saved much for the freezer (last year I did all freezing and only one type of canning - pickled garlic).  You may spend a bit more for food in the summer/fall months but stocking up on all this great produce means you eat better and cheaper in winter and early spring.
  Now a bit about each different kind of food saving.  Blanching and freezing is probably one of the easiest and least time consuming of the methods.  Most non-leafy greens can be frozen but the bacterial break down of the food needs to be stopped before freezing so the produce will last longer.  Bring a large pot of water to a boil, clean and prep your vegetables, whether it be green beans, corn, eggplant, broccoli, etc, then dunk them into boiling water for the allotted time (there are plenty of websites out there with suggested blanching times).  Immediately transfer the veggie to a cold ice bath to stop the cooking process.  I then take the veggies out to drain and dry on a towel or colander.  Once it is dry there are two ways to freeze - place on a sheet tray and stick in freezer so all pieces will freeze individually and not in one big chunk or immediately place in a ziploc or foodsaver bag (try to get as much air out as possible).
  If you have a deep freeze my suggestion is that you get a couple big plastic milk crates or file folder crates.  I freeze my food (pasta sauce, veggies, shredded cheeses, soups etc) flat in plastic bags so they can stand up-right in a file folder manner and i can just flip through the "files" and grab what I need (this is a good space saver method for small freezers as well).  Be sure to label contents and I label date of expiration instead of the date I froze it; that way I know when to throw it out!
  Canning on the other hand takes a little investment and some equipment - although you can find a lot of great used equipment on ebay or at local garage sales.  What you need:  large 20 qt or more stock pot for boiling cans, a basket (like what Ball sells to lower cans) or a basket stand that sits on the bottom of the pot so the glass doesn't touch the burner, funnel, measuring/stir stick, magnetic lid grabber, jar tongs, jelly/pint/quart canning jars with lids and rings, a great recipe and fresh fresh produce.  I won't go into the details of canning here because there are a lot of great websites with lots of detail but know that there are two processes and for beginners it's best to stick with acidic canning and not having to use an expensive pressure canner.  If a food is not acidic or being pickled in acid then you must use a pressure canner and I haven't ventured into this realm yet because it kind of intimidates me. ;-)  This was a great beginner investment for me and works well! http://www.freshpreservingstore.com/detail/TCL+1440010790
  The last method I will discuss is dehydrating.  I will tell the truth and say that I haven't yet done any dehydrating, I was waiting for the day when James brings home a deer and try my hand at jerky.  My brother-in-law is, however, a dehydrating king and loves it.  He's figured out the secret to crispy banana chips and apple chips as well as making great healthy fruit roll-ups for his kids!  I'll have to pick his brain sometime on exactly his secrets and share it with everyone else.
  I hope this blog gets your wheels turning and my best advice is to start preserving the food you love and the food you miss most in the winter months!  Happy preserving!