Wednesday, November 30, 2011

Wild Mushroom Risotto

You may sense a recurring theme in our household meals - Mushrooms!  Yes, James and I love mushrooms but they provide an awesome substitute for meat in your dishes and taste wonderful as well.  This recipe is one that I've been adverse to try for a while now due to the high costs of morel mushrooms and saffron but this last week I just said the heck with it and tried it anyways (not to mention I still had some saffron leftover in my pantry).  When it came down to final prices it was about eight dollars per serving so it won't be in our usual weekly repertoire but definitely a great meal for special occasions.  James and I both agreed that this was the most amazing meal I've made to date! 

Serves:  6

Ingredients:
  - 1 oz dried morel mushrooms (usually come in 1/2 oz pkg at a specialty food store)
  - 1/2 lb fresh cremini mushrooms (can substitute shiitake or portobello)
  - 4 cups homemade chicken stock
  - 6 tbsp unsalted butter
  - 2 oz pancetta, diced (can substitute american bacon)
  - 1/2 cup chopped shallots (3 shallots)
  - 1 1/2 cups arborio rice (very important that you use arborio)
  - 1/2 cup dry white wine (pinot grigio, sauvignon blanc, etc)
  - 1/2 tsp saffron threads
  - 1 tsp kosher salt
  - 1/2 tsp fresh ground pepper
  - 2/3 cup grated parmesan cheese, plus extra for serving

Place the dried morels in a bowl and pour 2 cups boiling water over them.  Set aside for 30 minutes.  Scoop the morels from the water with a slotted spoon, reserving the liquid.  If some of the mushrooms are large, cut into 2 or 3 pieces. Pour the  mushroom liquid through a coffee filter or paper towel (morels can be gritty). You should have 2 cups; if not, add water to make 2 cups.  Set the mushrooms and the liquid aside separately.
  Meanwhile, remove and discard the stems of the cremini and rub any dirt off the caps with a damp paper towel.  Do not rinse them!  Slice thickly and set aside.

In a small sauce pan heat the chicken stock with the 2 cups of reserved mushroom liquid and bring to  a simmer (be careful not to boil off too much of the liquid or it won't be enough).
  In a heavy-bottomed dutch oven, melt the butter and saute the pancetta and shallots over med-low heat for 5 minutes.  Add the morels and porcini and saute for another 5 minutes.  Add the rice and stir to coat the grains with butter.  Add the wine and cook for 2 minutes.  Add 2 ladles of the chicken stock mixture to the rice plus the saffron, salt and pepper.  Stir and simmer over low heat until the stock is absorbed, 5 to 10 minutes.
Continue to add the stock 2 ladles at a time, stirring every few minutes.  Each time, cook until the mixture seems a little dry before adding more of the stock mixture.  Continue until the rice is cooked through, but still al dente (not soggy) about 25-30 minutes total.  When done, the risotto should be thick and creamy and not at all dry.  Off the heat, stir in the parmesan cheese.  Serve hot in bowls with extra cheese on top!

Friday, November 18, 2011

Turkey Day . . .

This post begins a series of blogs about the different foods that we consume during the holidays.  Being the centerpiece and the alternate name for one of our nations most treasured holidays I thought it a good starting point to begin with turkey.  Most every family in the country will buy a grocery store bought turkey to cook for their Thanksgiving feast, whether it be Butterball, Tysons or some other astronomically huge food company.  I wonder, however, how we might rethink what we are thankful for during this great holiday if we knew a bit more about the food to which we are giving our thanks.
  Industrial turkey operations are abominable and contribute to our unhealthy populous.  Don't get me wrong, I'm  not a big animal right's activist but the living conditions of the turkey contribute to the unhealthiness of the meat.  Turkeys are raised on giant farms (similar to chicken farming) mostly in the midwest and the south.  They never see the outdoors in their short lifespan unless it is in the truck ride to the slaughtering plant.  They are kept by the tens of thousands in enclosed houses with no natural light, wood chips covering the floor to absorb their waste (which isn't cleaned out until the turkeys are removed to the plant, a period of 12 - 14 weeks) the ammonia fumes given off by this waste is enough to burn your eyes and throat (imagine what it's doing to the birds) they are so cramped they can't move to develop good muscle for meat and their beaks are snipped so they can no longer peck and choose what to eat but are only able to shovel mass amounts of antibiotic laden corn into their stomachs.  To increase the amount of food the turkeys eat lights are kept on 24 hours a day to keep the turkeys awake and continually eating to gain weight.  Wild turkeys eat a varied diet of bugs, grass, and seeds which give them rich flavor and varied meat (white and dark).  The mono-diet of corn that industrial birds consume gives them very little flavor so at the processing plant all the birds muscles are injected with saline solution and vegetable oil to bulk them up and add flavor.  Hence the ginormous task of the home cook to keep the turkey moist, flavorful and edible.
                              Industrial white breasted turkey house.                             
Naturally raised organic turkey farm. . . you choose what looks healthier!
   Before industrial farming, it was no culinary feat to cook a turkey - just place it in a roasting pan with some stuffing, salt and pepper and it came out wonderfully flavorful - not so with industrial turkey.
  There is the huge issue of cost, however.  I've been receiving lots of emails from my local pasture-raised organic meat coop to pre-order my turkey for the holidays.  I believed that was a great idea and I love to jump at any chance to provide good wholesome food for not just my immediate family but the extended family as well - that was until I saw the prices.  For a naturally raised no antibiotic fed turkey in Northern California it's about ten dollars a pound, that's seventy dollars for a seven pound turkey!  Knowing that my mother-in-law usually gets at least a fifteen pound turkey if not larger I understood there was no way an average American household could afford this and we certainly could not.
  Here are the alternatives I came up with:  go for a traditional old-world style Thanksgiving and negate the leftovers (after all, the pilgrims certainly weren't putting leftover bird in the fridge or freezer for black Friday) therefore we would need a much smaller bird and compensate with more side dishes.  Non-traditionally we could cook Cornish game hens or any birds that the family had recently nabbed (i.e. ducks, quail, wild turkey, etc.).  For those families that hunt this is a great alternative but for those who don't organic game hens run about $3.15 a pound and can be cooked just like a turkey but in less time!
  Looking forward to any comments from you on alternatives to the industrially produced turkey feast . . . Happy Thanksgiving!

Thursday, November 10, 2011

Tropical Smoothie

I find that I've recently started wasting a lot of money at Jamba Juice.  I love that place and it is good for you but I would rather buy organic fruits and milk products and make my own at home for much less than the five plus dollars they charge you!  This is a great smoothie and works well for a morning rush out the door breakfast or a leisurely Sunday brunch with lots of breakfast goodies.

 
Serves: 2 (you can make the full recipe and freeze the extra for the next morning)
Ingredients:
  - 1/2 ripe mango
  - 1 cup pineapple (frozen or fresh)
  - 1 ripe banana
  - 1/4 cup orange juice (I like to use the Naked orange juice or you can use fresh squeezed)
  - 1/2 cup milk
  - 1/4 cup plain yogurt
  - 1 tsp to 1 tbsp good honey (add more honey if the fruit isn't quite ripe or sweet enough)
  - 1 cup of ice (if using frozen fruit use less ice)
  - Add any extra fruit you may think would be good:  berries, kiwi, papaya, etc.

Place all ingredients in a blender and blend until smooth.  Enjoy!

Tuesday, November 8, 2011

A Safe and Clean Household Environment

So I've been thinking about this for a while and just recently started to research it.  I constantly look at what's in my food and make sure there are no synthetic unpronounceable items in it - and if so it goes directly to the banned list of products.  Why then, have I not moved this household philosophy further?  Laziness or lack of research could be to blame but it could also be and most likely is my OCD.  I am a germ clean-freak and I bleach everything.  I like my house to smell good with scented candles when I walk in the door and I love cleaning products that make me feel like I'm killing all those microscopic germs (not to mention I love bleaching my whites and making them look like new).

  Bleach is horrible stuff, I've known that for a while.  I use it in abundance for cleaning the bathroom, kitchen, dishes and the laundry.  I've even given myself migraines (coming from the chlorine gas) for over using it but relished in the fact that I killed all those nasty viruses and germs in my house.  There's a better way, though, and it kills just as much germs, still makes the house smell clean (kills odors) and is just fine with the environment because it is a naturally occurring substance - H2O2 or commonly known as hydrogen peroxide.  It's cheaper, non-toxic and just as efficient.

  It can be bought in two strengths - the usual 3% solution at your pharmacy or a higher "food grade" strength of 35% at your local health food store or drug store.  H2O2 is much better for those people on a tight budget as well because it costs pennies on the dollar of all those pricey name brand cleaners and works just as well if not better!

Some helpful tips on how to use hydrogen peroxide:
  - Store out of sunlight and in a well marked preferably dark bottle (this helps it not revert back to oxygen gas and water)
  - Toothbrushes can be dipped in the 3% solution to de-germ and then used after well rinsed.  A solution of 1 tbsp H2O2 to 1 cup of water can be used for mouthwash and this will whiten teeth over time and kill bad bacteria (much cheaper than Listerine). 
  - Counter tops, cutting boards, sinks, door handles or any non-porous hard surface can be sprayed with equal parts 3% H2O2 to water in order to disinfect and clean.  This same solution will also help remove toilet stains and bad bacteria.
  - Just as with bleach in laundry, one cup of 3% solution to a load of whites will keep your whites white! :-)
  - Use the 3% solution to remove blood, red wine stains etc on carpet and it won't bleach the fibers.
  - Of course it always works well to disinfect cuts and bug bites!

  This blog post may not pertain to how you cook and prepare food but the object of this blog is to help you live a healthier less toxic life and this is a great step to take to save you money and help out the environment! 

Sunday, November 6, 2011

Caesar Club Sandwich

This is my favorite homemade sandwich and after looking at my recipe lists I determined it was time to add more lunch recipes.  The recipe is adapted from a Barefoot Contessa recipe and one of the first things I ever cooked outside my comfort zone.  It's wonderful with some homemade chips or a hot bowl of soup.  I hope you like it!

Serves:  3
  Ingredients: 
  - 2 split (1 whole) chicken breasts, bone in, skin on
  - good olive oil
  - 4 oz thinly sliced pancetta (can substitute bacon but pancetta is tastier)
  - 1 large garlic clove
  - 2 tbsp chopped fresh flat-leaf (Italian) parsley
  - 1 1/2 tsp anchovy paste (found in the asian food aisle usually)
  - 1 tsp dijon mustard
  - 1 1/2 tbsp freshly squeezed lemon juice
  - 1/2 cup good mayonnaise (good mayonnaise should only have 3 ingredients!)
  - 1 large ciabatta bread (french bread works well too)
  - 2 oz baby arugula, washed and spun dry
  - 12 sun-dried tomatoes in oil, drained
  - 2 to 3 oz Parmesan cheese, shaved

  Preheat oven to 350 degrees.
  Place the chicken breasts on a sheet pan skin side up.  Rub the chicken with olive oil and sprinkle with salt and pepper.  Roast for 35 to 40 minutes, until cooked through.  Cool slightly, discard the skin (or feed it to the dog!) and bones, and slice the meat thickly.  Set aside.
  Meanwhile, place the pancetta on another sheet pan in a single layer.  Roast for 10 to 15 min. until crisp.  Set aside to drain on paper towels.  (This step can be done after the chicken and the same sheet pan can be used to make clean-up easier).
  Place the garlic and parsley in the bowl of a food processor (or a blender) and process until minced.  Add the anchovy paste, mustard, lemon juice, and mayo and process again until smooth dressing like consistency.  (Refrigerate dressing if not using immediately - this part could be doubled or tripled and the extra dressing stored in the fridge for later)!
  Slice the bread in half horizontally and separate the top from the bottom.  Toast the bread in the oven, cut side up for 5 to 7 minutes.  Cool slightly.  Spread the cut sides of each piece with Caesar dressing.  Place half the arugula on the bottom piece of bread and then layer in order:  sun-dried tomato, shaved Parmesan, crispy pancetta, and sliced chicken.  Sprinkle with salt and pepper and finish with another layer of arugula.  Place the top slice of ciabatta on top and cut in thirds crosswise.  Serve at room temp.

Friday, November 4, 2011

Spaghetti Squash with Mushroom Meat Marinara

This is a recipe that I've refined over the years and I started fixing spaghetti squash thanks to my longtime friend's mom who made it for me years ago.  Spaghetti squash is a wonderful way to mix-up your usual Italian dinners the flesh looks just like spaghetti when cooked but has a great crunch as well!

Serves: 4-6

Ingredients:
  - 1 large Spaghetti Squash
  - 2 tbsp Olive Oil
  - 1 lb of Grass-fed Ground Beef (can substitute Italian sausage spicy/mild for more flavor)
  - 1 medium Zucchini, chopped
  - 1 large Yellow Onion, chopped
  - 1 large Red Bell Pepper, chopped
  - 6 cloves of Garlic, minced
  - 2 large Portobello Mushrooms, chopped
  - 2 tbsp Italian Seasoning
  - 1 tbsp Salt
  - 3/4 tbsp Ground Pepper
  - 1 1/2 tbsp Red Wine Vinegar
  - 1 14.5 oz. can Diced Tomatoes
  - 1 1/2 cans of Tomato Sauce
  - 1 tbsp Butter
  - 1 cup shredded Mozzarella or Mozzarella and Pecorino Romano mix

In a large stock pot bring enough water to boil to submerge the spaghetti squash.  Using a fork puncture the washed spaghetti squash on all sides in order to let steam escape.  Place the squash in the boiling water and boil for 45 minutes, making sure to turn the squash so it gets cooked on all sides - the squash will float.
   Meanwhile heat a large skillet to medium-high heat with the olive oil.  Add the onions, garlic and beef into the skillet and cook until onions start to become soft and the beef browned - about 5 minutes.  Add the peppers, zucchini, salt, pepper, and seasoning - cook until the peppers and squash begin to soften - about 5 minutes more.  Add the mushrooms and cook another 5 minutes.  Add the tomatoes and vinegar, bring to a simmer and simmer for 10 minutes.  Taste for seasoning, add more salt or italian seasoning if needed.  Sauce will be thin at this point, let it simmer on the stove until the flavors are well mixed and the sauce is the thickness that you desire - up to an hour.  (This will make much more sauce than you need, this is a good time to stock your freezer with an extra meal's worth of marinara sauce).
   After the squash is boiling for 30 minutes preheat the oven to 350 degrees.  Drain the squash when it is done boiling and place it on a cutting board, using a sharp knife cut the squash in half and remove the pulp and seeds (like any melon or squash) place the cleaned halves on a cookie sheet cut-side up.  Using a fork, test the squash for doneness - the meat should start to come off in spaghetti-like pieces but it should still be pretty tough at this stage).  Spread a 1/2 tbsp of butter on the meat of each half of the squash and place the cookie sheet in the oven for 30 minutes, after 30 minutes the meat should separate easily from the skin and come off in pasta like strings.  If it is still a little difficult to remove the meat from the skin bake for another 15 minutes.

At this stage there are two ways to proceed, either remove all the meat from the squash and serve like you would any normal pasta or use the squash skin as the vessel for serving.  If choosing the second method, place the desired amount of marinara sauce in each half of the squash, cover with half the cheese and place back in the oven for 5 minutes or until the cheese is melted.  Remove the squash and slice each half into subsequent halves and serve!

Monday, October 31, 2011

A Cook's Best Friend. . .

So I've blogged a little before about organizing and how to best prepare foods and make it easier on yourself and your busy schedules.  I stand by my statement that a freezer is a busy cook's best friend.  In this blog I'll try to outline the best ways to use a standard freezer/fridge combo and a chest freezer, for those of us lucky enough to have one.  I highly recommend buying one for anyone looking to save money in the long run - you can usually find them in estate sales and at dent and ding stores for much cheaper.  We bought ours as a floor model at Lowe's and ended up paying at least 100 dollars less than original price.
  To start I will talk to the average home freezer.  The best trick to efficiently using your home freezer is to freeze things like soups, sauces, veggies and other small things in flat sheets. Notice the bottom shelf . . .

My personal freezer is a little sparse at the moment because we have it all in our chest freezer but think of how many servings of split-pea soup, corn chowder and marinara sauces I could stack up on the top shelf as well.  The trick to freezing things flat are good sturdy freezer safe ziplocs: with a sharpie label the ziploc with the contents and the date the food will expire (things always look the same when they're frozen so you can never tell what's in that bag!) place the cooled prepared food into the bag laying flat on your counter (enough for one night's meal)  and seal trying to expel as much air as possible.  Lay the ziploc flat on the bottom of your freezer (or on a cookie sheet if you have no flat surface) things like soups and sauces can usually stay for up to 6 months in the freezer! 
  For storing these ziplocs in a chest freezer it's good to get a plastic file crate and put it in the bottom of your freezer then place the ziplocs upright in the crate (the frozen ziplocs can be sifted through like file folders and you can easily find whatever you need).  I also recommend, as I have before, to double or triple your recipes on those nights that you do cook to quickly get your freezer stocked with extra meals.
My chest freezer may look a little crazy but everything is assorted into its requisite bin.  I chose this freezer because it had hanging and sliding baskets so things won't get buried beneath everything else.  Since we buy beef in large quantities our freezer is mostly meats, stocks, and lots of frozen summer corn.  I have bins for steaks, roasts, offal, and ground beef.  The stocks are all labeled in freezer safe containers and placed on the bottom of the freezer.


To further help me in my meal planning I create a list that I stick on the outside of the freezer that lists what's in the freezer and how many servings there are.  When something is used I just strike it off the list or reduce the number of servings listed.

This helps when I sit down on Sunday and make my grocery shopping list.  I know what I already have on hand and this way I don't buy so much at the store and spend less money in the long run.  To further help me save money I always keep my eye out for any special deals on organic meat that I can stock up on and put in the freezer - like the organic pork sausages that I bought last week for half price!  You may spend more money on a certain trip to the store one week but it will be a lot cheaper in the long run.  Happy organizing!

Monday, October 24, 2011

Chicken Bouilliabaisse with Garlicky Beans

This is a much simpler bouilliabaise than the classic bouilliabaise and the beans give it a heartiness that's homey and satisfying.  I recently found in my favorite book store a book on braises and stews by Tori Ritchie.  Braises and stews are great because they give you lots of flavor with little effort - most of the time just pop it in the oven or crock-pot and let it be.


Serves: 4-5
Ingredients:
  - 4 Chicken legs, split into drumsticks and thighs (you can choose to leave skin on or off but I think it adds flavor)
  - Kosher salt
  - 6 tbsp olive oil
  - 1 yellow onion, sliced
  - 1/2 cup dry white wine - I used Pinot Grigio
  - 4-inch strip of orange zest (don't zest it into little pieces you'll want to remove it later)
  - 1 tsp dried thyme
  - Generous pinch of saffron threads
  - 1 can (14.5 oz) diced tomatoes
  - 1 cup chicken broth (preferably homemade)
  - 2 cans (15 oz) garbanzo beans, drained and rinsed
  - 4 garlic cloves, minced
  - 3/4 tsp red pepper flakes (more if you like it spicier)
  - 4 oz crumbled feta cheese

 Preheat an oven to 375.
 Rinse the chicken and pat dry with a paper towel.  Sprinkle with salt.  Heat 3 tbsp of the oil in a 5-7 quart dutch oven over med-high heat.  Add the onion, sprinkle with salt to taste and cook, stirring until softened - about 3-6 minutes.  Add the wine, zest, thyme and saffron and let come to a boil.  Add the tomatoes and broth and bring to a boil again.  Put chicken in pot, pushing it down in the sauce.  Cover and transfer to the oven.  Cook until chicken is opaque at the bone, about 45 minutes. 

  Meanwhile, in a baking dish, stir together the beans, remaining 3 tbsp of oil, garlic and red pepper flakes.  Put in oven alongside the chicken for the last 15 minutes of cooking time.  Remove the beans from oven and stir in the feta, season with salt and pepper.  Spoon beans into bowls and top with chicken and sauce.  Serve with crusty bread to sop up the extra juice!

Thursday, October 20, 2011

My apologies and new thoughts. . .

So I've committed the ultimate blogger sin - falling behind in posts which leads to lack of interest and general apathy in my readership - for shame!  I do apologize and I blame it on my lack of focus on food in general in the past few months (lots of travel to Missouri, working out of town during the week where there is no place to buy organic or healthy foods of any quantity or quality, worried about finding a real job, etc.).  It has been possible for me with the new job, where I live in a house at a winery helping my brother-in-law manage construction on the site, to eat organically by going to Whole Foods on Sundays and stocking up and planning for the week.  I cook for myself and one other person that works and lives with me at the winery who also subscribes to my food philosphy.  So generally my breakfasts and dinners are good organic food but here's the problem - lunch!
  My lunches are now revolving around the work place and construction work environment.  The owner of the winery buys us lunch most days and other days I go out and get the crew lunch.  It's great to not have to worry about paying for lunches but I have felt my heath issues returning and feeling less well and lethargic these days because of it.  Maybe that's why I have felt less like blogging . . . maybe a little bit of a hypocritical dilemma running through my brain.  I did, however, on recommendation from a new friend just watch a new documentary that may have just changed my outlook on food all over again.
  This documentary is called "Fork Over Knives" and it follows two doctors that over the course of their practice and in-depth research have proven that animal based foods are the cause of most cancers and heart diseases.  Not only is the corn fed beef and industrial meat substances bad for us but meat in general.  Of course it is MUCH better to consume grass-fed and pasture raised animals in reasonable quantities but their extensive studies prove that we should probably be eating only grains, fruits and veggies without dairy, meat or added oils in our diet.
  Their studies are very convincing - people who had had multiple bypass surgerys or extensive cancers throughout their bodies have gone on to live decades after their illnesses and have made complete recoverys, sometimes without chemo and radiation or even surgery - biologically I have one qualm.  If humans were not meant to eat meat then why do we have "meat tearing" canine teeth?  Is this just a hold over from our evolutionary make-up, which we have evolved away from but no longer need (like our tail bone with no tail?) or do those canine teeth have a different purpose now?  Do we need the canine teeth for tearing into fibrous veggies like celery and broccoli?  Next time I eat I am definitely going to pay more attention ;-) but for now I think I will just significantly reduce the amount of meat I consume. 
  Until next time your thoughts and opinions are definitely welcome.  Happy eating!

Tuesday, September 6, 2011

The scary world of dehydration. . .

So this last weekend Meredith and I decided to continue improving on our preserving prowess and we canned more tomato sauce.  We ordered the organic "seconds" (bruised and split) tomatoes from Soil Born farms (they ended up being beautiful unblemished masterpieces of organic goodness and not bruised at all, for a whopping 50 cents a pound!  So with 60 pounds in total and an array of other goodies we headed home to her house in Amador.  Luckily she has a great brick patio with some shade and we set up our big cooking operation from the previous weekend.  The one big difference is that we had decided to try our hand at dehydrating fruits and veggies as well.
  Our friends and family graciously donated their dehydrators for our venture and I had visions of dried soup mixes and scrumptious dehydrated fruit snacks dancing in my head.  We took the Ball Blue Book and a guide, "How to Dehydrate Food" as our bibles and compared the two recipes.  Through the comparison we came up with our game plan of what fruits and veggies we needed to pretreat in citric acid, how thick we cut them and at what temperature the dehydrator should be set.  What we found was not all fruit and veggies are created equal and what a P.I.T.A some of them were!
  Apples, pears, strawberries, and figs were the easiest and seemed to come out the most uniform (all but the figs were pretreated with citric acid).  White peaches were AMAZING dried but quite a bit of work with blanching, peeling, pitting and slicing.  Grapes, blueberries and cherries - while amazing tasting - were too messy, too time consuming to prep and took WAY too long to dehydrate.  I'll buy my raisins at the grocer in the future.

   The plan for the fruit is to make homemade trail mix.  This is something I used to do all the time in Italy before our long bus rides every weekend with my architecture class.  My roommate and I would venture down to the Mercato Nuovo and visit our favorite dried fruit vendor - he had EVERYTHING!  Our favorites being dried mango and pineapple.  Then we would head over to get a bag full of almonds and walnuts with some chocolate candies.  Our DIY trail mix would sustain us on those long bus rides from city to city.  Today I went to Whole Foods and stocked up on raw nuts and semi-sweet chocolate chips from the dry foods bins and once my homemade dried fruit is done conditioning after a week it will all get put into individual snack size food-saver bags!
  For the homemade dried veggies, less pretreating was necessary and they came out fairly uniform.  Green beans, okra, onions, peppers and corn came out great.  Carrots were too much work and do not retain much of their nutrition or flavor after drying so those are nixed for my future dehydrating endeavors.  Meredith and my greatest find, however, were dried zucchini!  We ended up slicing a lot of Mer's extra zucchini from her garden and seasoning it with a garlic seasoning mix.  When dehydrated zucchini becomes crispy and with seasoning easily takes the place of a chip - flavorful, crunchy, no fatty oils and raw so it retains all the nutrients!  Just remember to go light on the seasoning because the "chips" are much smaller after dehydration which compounds the spice flavor!

10 medium zucchini sliced 1/4 inch with garlic salt, pepper, and onion powder.

10    pounds   of   zucchini   equals   a   quarter   pound   of   zucchini    chips!

Thursday, September 1, 2011

Bloody Mary Mix (Alcoholic or Non)

This recipe is the one I used last weekend for canning but it will probably stay in the fridge for a week or more and would freeze excellently (just add the vodka before pouring yourself a glass otherwise it won't freeze). 

Makes: 5 quarts - 20, 8 oz. servings

Ingredients:
  - 30 medium tomatoes, peeled, seeded, decored and quartered
  - 2 1/2 cups green peppers, chopped
  - 1 3/4 cups carrots, diced
  - 1 cup celery, diced
  - 1 small onion, diced
  - 4-6 garlic cloves, minced
  - 1 Serrano pepper, seeded and minced (optional)
  - 1/4 cup parsley, minced
  - 1 bay leaf
  - 1/4 cup sugar
  - 1/4 cup fresh squeezed lemon juice
  - 2 tbsp salt
  - 1 1/2 tbsp Worcestershire
  - 1/2 tbsp Tabasco or to taste (I added about 3 tbsp)

  To peel the tomatoes slice the skin of the tomato after washing and drop in boiling water for 1 minute or until skin becomes wrinkly, remove and drop in an ice bath.  When cool the skin will peel right off and then just core and cut in quarters and push seeds out with your thumbs.
  Cook the ingredients from the tomatoes to the parsley in a large pot until mushy - it will quickly become soupy - cook for 30 to 45 minutes, until veggies become softer.  Remove the bay leaf and working in batches, place the contents of the pot in a blender and puree to a desired consistency for drinking.  Return blender mixture to the pot and add the remaining ingredients.  Taste for seasoning and spiciness.  Bring this to a boil and either can the contents, place in a refrigerator container for immediate enjoyment or store in freezer safe containers for later.  If canning place in sterilized quart jars and water bath can for 40 minutes.
  Add the desired amount of vodka (or not) to mixture and place in shaker with ice, shake vigorously, pour chilled mixture into a glass with ice and pickled garnish or celery stick.  It's great with brunch or as an afternoon treat before dinner!

Tuesday, August 30, 2011

Fun at the farm. . .

So this post is going to be less about ways to eat and live better and more about how much fun I had last weekend at the farm where our CSA  box comes from.  Every year, as a thank you to being a farm member, Eatwell hosts two tomato saucing parties.  They invite whoever wants to come out to turn 1800 pounds of tomatoes (roma, heirloom, beefsteak, etc) into whatever wonderful concoctions you can dream up - for free.  All you have to bring is the propane stove, your utensils for cooking, chopping and blending and your jars - they supply the tomatoes, onions, peppers, basil, water and pressure canners as well as the spacious hoop houses with lots of tables.


The hoop houses where the canning is set up.

  This year was my first year and my sister Meredith came out with me to be my sous chef.  I wasn't really sure how much I would get canned but I was hopeful it would be a lot (I bought 48 quart jars which ended up being a little too ambitious). Meredith and I arrived at the farm 30 minutes early to make sure we had a prime spot, unloaded our turkey fryer, dual propane stove, two coolers, blender, pots, cutting boards and 2 five gallon propane tanks and got things hooked up and ready to go.  Within an hour of arriving, a wonderful concoction of freshly picked tomatoes was boiling away on our stove and the turkey fryer water was heating up ready to sterilize jars.

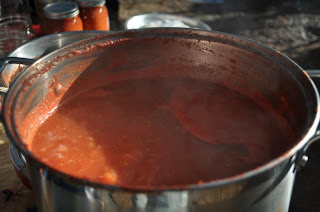
The sauce just after coming to a boil - the foam boils away after an hour or so and it reduces by about a 1/3 before it's ready for canning.
The recipes that I had spent hours looking for on the internet were the easiest and the most flavorful I  could find.  Making tomato sauce had previously been a little off-putting to me because it is so much work - boiling the tomatos, putting them in an ice bath, peeling the skin off, slicing, decoring, deseeding, draining and then boiling down before processing in jars.  I found a great recipe online that said to just wash your tomatoes, slice them in quarters, remove the stem and blend to a liquid consistancy then just boil it for 2.5 hours until it is at the thickness you want and then can for 25 minutes in a boiling water bath canner.  That was a lot less work in my opinion and the added bonus is that not peeling off the skins adds more nutrients to the sauce.  By blending it all up together the pulp, skins and seeds all become one texture and no one would no the difference unless you told them. 


Meredith blending up the tomatoes for the sauce.
  The long part of the process is waiting for it to boil down so while we had our first pot of tomato sauce boiling away we decided to prep the tomatoes and other ingredients for our bloody mary mix.  Unfortunately the recipe I found for bloody mary mix called for peeled, cored and deseeded tomatoes, so Mer and I promptly set in to blanching, cutting and peeling 60 tomatoes.  It was a messy repetitive job but it helped pass the time as we waited for things to cook.  Added to the tomatoes were onions, parsley, worcestshire, tabasco, serrano peppers, celery and carrots.  After all this cooks down for 45 minutes you blend it all up, return it to the pot, check for seasoning and spice, bring to a boil and can in a water bath canner for 40 minutes.  You can drink it with or without alcohol and my little taste test before canning told me it was going to be pretty darn good!

The first batch to come out of the canner.
  We cooked and canned from 10:30 am to about 9:30 pm.  We got 13 quart jars of sauce made and 11 jars of bloody mary mix, plus we made a great meat ragu to share with everyone that night at dinner.  Mer and I learned some valuable lessons that will only help us to be more efficient and organized next year.  We know that we definitely need at least one more pair of hands and an extra turkey fryer wouldn't hurt either.  Eventhough it was a lot of work, we found ourselves planning to do it again before the season is over - perhaps in Mer's backyard.  We would just need to find a cheap supplier of organic tomatoes in large quantities.  Perhaps I'll call Eatwell this week and see if I can get a few more crates of tomatoes and do some more canning this weekend.
  Once you start canning it quickly becomes an addiction!  I encourage everyone to try it out at least once - it makes for great presents at the holidays and what better way to preserve the fresh taste of summer all year round!

Wednesday, August 24, 2011

Lemon Fusilli Pasta

This is another great recipe from Ina Garten - it's fulfilling in that it cures your carb craving but uses great fresh ingredients like cherry tomatoes, which are especially wonderful this time of year. It's great served hot or room temperature!

Serves:  4 to 5

Ingredients:
  - 1 tbsp olive oil
  - 1 tbsp minced garlic (I usually double this)
  - 2 cups heavy whipping cream
  - 3 lemons (with good clean rinds)
  - 1 lb dried fusilli pasta
  - 1/2 lb baby arugula (or 2 bunches common arugula - the more arugula grows the more bitter it gets)
  - 1/2 cup freshly grated paremsan
  - 1 pint cherry tomatoes, halved

Heat the olive oil in a medium saucepan over medium heat, add the garlic, and cook for 60 seconds. Add the cream, the zest from 2 lemons, the juice of 2 lemons, 2 teaspoons of salt, and 1 teaspoon of pepper. Bring to a boil, then lower the heat and simmer for 15 to 20 minutes, until it starts to thicken.

Bring a large pot of water to a boil, add 1 tablespoon of salt and the pasta, and cook according to the directions on the package, about 12 minutes, stirring occasionally. Drain the pasta in a colander and place it back into the pot. Immediately add the cream mixture and cook it over medium-low heat for 3 minutes, until most of the sauce has been absorbed in the pasta. Pour the hot pasta into a large bowl, add the arugula, Parmesan, and tomatoes. Toss well, season to taste, and serve hot

Monday, August 22, 2011

But I Don't Have Enough Time!

I know there are skeptics and naysayers out there in regards to my "localvore" way of eating and feeding my family because of the amount of time everyone thinks it takes.  The key to successful healthy eating is organization and planning.  For those of you with desk jobs or the usual 9-5 work day there is almost always a few minutes a day - whether it be a 15 minute coffee break or a few minutes on your lunch break where you can sit down and write up a menu for the coming week's meals.  I try to divide my list into each day with lunch and dinner listed (breakfast is usually the same every morning); I find it also very helpful to plan to cook a large casserole or pot of soup at least once a week so that it can be used for leftovers and that way I don't have to cook some of the nights.  If you're short on time during the work week but have an extra hour or two on the weekends when you're fixing dinner try to prep or make another of your meals ahead of time and freeze it or have it ready to be thrown together in a few minutes. When I'm preparing something in advance I try to double or triple the recipe and freeze the extra portions to stock up the freezer for those nights I'm in a pinch and don't feel like cooking.
  When grocery shopping, in order to make your trip the fastest possible, organize your shopping list into the appropriate food areas in your grocery store (i.e. produce, meat, dry goods, dairy, etc).  Think about the way you travel through the store and list the different categories in that order.  This little bit of organization ahead of time can save you lots of time from running back and forth across the store trying to find the last few items on your list.  To make your trip even faster, shop with another adult or teenager in your household and give them half the list!
  My previous blogposts mentioned going to farmer's markets on the weekends to stock up on produce and other local goods and you may be telling yourself "the hell with getting up early in the morning on the weekend to go produce shopping!"  There are some other great benefits other than just picking up some local fruit and veggies, however.  Many farmer's markets have ready made meals all prepackaged and ready for purchase like homemade pasta and pasta sauces, baked artisan breads with toppings baked in that are great for do-it-yourself pizzas and ready made desserts.  A lot of food vendors have set-up shop at their local farmer's market as well, so it's a good place to get breakfast and that takes one more meal off your list that you have to prepare.
  I find it very refreshing to get up and grab a cup of coffee or tea at the market, walk around with James and see what looks good, and take the dog out for a long walk.  Getting up and doing something on the weekend also helps me be more productive the rest of the day.  I find I get a lot more done when I get up and be productive right-off-the-bat versus lounging around the house with my cup of tea.  Farmer's markets are also a great place to take the kids - it gives them a place to run around, interact with people and learn about the different things that farmer's grow in their area as well as expand their food palette.
  Hopefully these tips help you out with your busy schedules and allow you to more easily prepare healthy meals for you and your family!  Bon appetite!

Sunday, August 21, 2011

Pickled Garlic

This was my first venture into canning and it turned out pretty well - the inspiration came from a farm outside DC where they have an annual corn maze and farmer's market with lots of canned jelly's and veggies.  Great for a snack with drinks or as a garnish in savory drinks like bloody mary's!


Makes 3 pint jars.

Ingredients:
  - 14 heads of unblemished garlic (blanch in boiling water for 1 minute and then place in cold ice bath to easily peel the skins off without damaging the cloves)
  - 3 cups of 5% white vinegar
  - 2 tbsp pickling/kosher salt
  -  1 cup sugar
  - sliced spicy peppers (jalapeno, serrano, wax, etc.) optional

  Boil the garlic in vinegar, salt and sugar mixture for 1 minute then place the garlic in the 3 sterilized pint jars to 3/4" below the rim.  Pour the solution over the garlic to 1/2" below the rim and wipe rim clean.  Place hot lids and rings on top and boil in a water bath canner for 20 minutes.  Remove and let stand for 24 hours before moving.  If top lid is sucked down and does not "pop" then canning was successful and they should stay in a dark cupboard for over a year.  Enjoy!

Thursday, August 18, 2011

Preserving summer's bounty. . .

It's that time of the year when more wonderful things are coming out of your garden, your local farmer's market or CSA than you could ever possibly eat!  The summer harvest is coming in with all kinds of peppers, tomatoes, squash, potatoes, corn, beans and fruit and they are in desperate need of saving before they go bad.  There are a few options on what someone can do to save the summer bounty for use in the more desolate months - some options are better than others in terms of nutrient value and flavor but all are a good idea.  Your four options are:  eat now, blanch and freeze, dehydrating or canning - in descending order of nutrient value!
  Since I don't have a yard or even many indoor vegetable plants, I spend a couple hours on my Saturday mornings (now that I'm working) at the San Ramon farmer's market.  It's about a 40 vendor market with a variety of meats, cheese, pasta, ice creams, food stalls and of course the fruit and vegetable vendors.  I'm always looking for whatever vegetables look best that week and what would be good to save for the winter, as well as whatever I need for dinner and lunches that week.  So far this year I've been on a bit of a canning spree and haven't saved much for the freezer (last year I did all freezing and only one type of canning - pickled garlic).  You may spend a bit more for food in the summer/fall months but stocking up on all this great produce means you eat better and cheaper in winter and early spring.
  Now a bit about each different kind of food saving.  Blanching and freezing is probably one of the easiest and least time consuming of the methods.  Most non-leafy greens can be frozen but the bacterial break down of the food needs to be stopped before freezing so the produce will last longer.  Bring a large pot of water to a boil, clean and prep your vegetables, whether it be green beans, corn, eggplant, broccoli, etc, then dunk them into boiling water for the allotted time (there are plenty of websites out there with suggested blanching times).  Immediately transfer the veggie to a cold ice bath to stop the cooking process.  I then take the veggies out to drain and dry on a towel or colander.  Once it is dry there are two ways to freeze - place on a sheet tray and stick in freezer so all pieces will freeze individually and not in one big chunk or immediately place in a ziploc or foodsaver bag (try to get as much air out as possible).
  If you have a deep freeze my suggestion is that you get a couple big plastic milk crates or file folder crates.  I freeze my food (pasta sauce, veggies, shredded cheeses, soups etc) flat in plastic bags so they can stand up-right in a file folder manner and i can just flip through the "files" and grab what I need (this is a good space saver method for small freezers as well).  Be sure to label contents and I label date of expiration instead of the date I froze it; that way I know when to throw it out!
  Canning on the other hand takes a little investment and some equipment - although you can find a lot of great used equipment on ebay or at local garage sales.  What you need:  large 20 qt or more stock pot for boiling cans, a basket (like what Ball sells to lower cans) or a basket stand that sits on the bottom of the pot so the glass doesn't touch the burner, funnel, measuring/stir stick, magnetic lid grabber, jar tongs, jelly/pint/quart canning jars with lids and rings, a great recipe and fresh fresh produce.  I won't go into the details of canning here because there are a lot of great websites with lots of detail but know that there are two processes and for beginners it's best to stick with acidic canning and not having to use an expensive pressure canner.  If a food is not acidic or being pickled in acid then you must use a pressure canner and I haven't ventured into this realm yet because it kind of intimidates me. ;-)  This was a great beginner investment for me and works well! http://www.freshpreservingstore.com/detail/TCL+1440010790
  The last method I will discuss is dehydrating.  I will tell the truth and say that I haven't yet done any dehydrating, I was waiting for the day when James brings home a deer and try my hand at jerky.  My brother-in-law is, however, a dehydrating king and loves it.  He's figured out the secret to crispy banana chips and apple chips as well as making great healthy fruit roll-ups for his kids!  I'll have to pick his brain sometime on exactly his secrets and share it with everyone else.
  I hope this blog gets your wheels turning and my best advice is to start preserving the food you love and the food you miss most in the winter months!  Happy preserving!

Monday, August 15, 2011

Everybody's Favorite Lasagna

So this is a recipe that has morphed a great deal from the original in Betty Crocker that my mother used to make all the time.  I started making this in college and at least once a month my roommates would demand that I make a huge batch of lasagna and then the 4 of us would have to consume the entire pan because our mini-fridge wouldn't hold the leftovers!  I get some flack for not using ricotta cheese in this recipe but the cheese mixture I use makes it gooey and moist.  Enjoy!

(Picture to come)

Serves:  6-8

Ingredients:
  - 2 tbsp olive oil
  - 1 pkg lasagna noodles
  - 1 14.5 oz can diced tomatoes
  - 1 1/2 14.5 oz cans tomato sauce
  - 1 diced white or yellow onion
  - 1 pkg button mushrooms sliced
  - 3-4 minced heads of garlic
  - 2+ tbsp italian seasoning
  - 1 lb mild or spicy italian sausage
  - 2 blocks of cream cheese
  - 1 lb package of shredded mozzarella (or fresh if you want to grade it yourself)
  - 1 large tub of 4% cottage cheese (can use 1  1/2 smaller tubs)

Take the cream cheese and cottage cheese out of the fridge and place in a warm area for the cream cheese to soften.  In a large saute pan add the olive oil and heat to a medium-high - add the sausage and onion and simmer until sausage is brown and onions translucent.  Add the garlic and mushrooms and cook until mushrooms are just tender.  Add the tomatoes (sauce and diced), the italian seasoning and 2 tsp of salt and 1 1/2 tsp pepper.  Simmer for 5-6 minutes and taste for seasoning - may need more italian seasoning.  Don't worry about getting the sauce too seasoned because it gets mixed with the noodles and cheese mixture which helps balance it out.
  Meanwhile heat a large pot of water to a boil and cook noodles as the box suggests - rinse the noodles in cold water to stop the cooking process and cool them off for easy handling.  Combine the softened cream cheese, cottage cheese and 3/4 of the bag of mozzarella - mix well.  Place a layer of noodles on the bottom of a large baking dish, ladle about half the sauce on top (enough to cover the noodles completely) and then spoon half of the cream cheese mixture on top of the sauce.  You may need to use your hands and a knife to evenly distribute the cheese.  Place another layer of noodles on top of the cheese and repeat the sauce and cheese steps again.  Place in an oven at 375 for about 30 to 45 minutes or until it is bubbly and starting to brown on top.  With 5 minutes left in baking sprinkle the last of the mozzarella on top and finish cooking.  Take lasagna out of oven and allow to cool at least 15 minutes for easier serving and to let it set up.

This lasagna freezes very well - just do all the steps except for the baking and cover the dish well and place in the freezer.  It can go straight from the freezer to the oven just extend the cooking time about 15 minutes.

This is also an easy recipe to double or triple so when you make one make several and store in freezer for those days you don't feel like cooking!

Monday, August 8, 2011

Waste not, want not

It's been said that Americans throw away almost 40% or more of all the food produced in this country.  After seeing what some grocery stores throw away just in "expired" produce I can believe that number is low.  At least some grocery stores have started to compost their expired products but more needs to be done to better plan for the consumer demands and we as consumers can do a lot more to change our eating and living styles to waste less. 
  I'm not talking about going out and becoming a freegan and dumpster diving for our food but I do applaud the freegan's tenacity.  A lot of our wastefulness has to do with attention to detail and having the frame of mind to think about things differently.  Not so long ago Americans who were too poor to afford the Filet Mignon cuts or even the rump roast ate the other parts of the animal that we now throw away by the millions of pounds.  A massive foodie revolution is occuring bringing back these "peasant" foods like tripe, tongue, oxtail, liver, heart and kidneys and it is delicious!  Imagine how many more people in this country we could feed if we could take away the stigma that people have acquired about eating these types of meats.  They are not bad for us, we're not poisoning ourselves by eating blood sausage (no worse than eating a rare cooked piece of meat) and most of the time the flavor is more rich and tasty than the choicest cuts of meat.  If we used more of the cow to feed more people we could also cut down on the environmental impact of massive feed lots.
  Now I don't recommend eating large portions of offal every night for dinner in lieu of a steak.  James and I consume any type of meat in reasonable portions and always less than the vegetables we eat in one meal.  Cooking with so many fresh vegetables, however, usually leaves me with a pile of cuttings, peels, and trimmings from prepping these veggies and I hate throwing them in the trash.  Composting is also an act that has acquired a big stigma for most Americans because it can be a stinky bug filled business.  With the rapid decline of our top soil and the massive amounts of waste we put in landfills every year it should be much higher on everyone's priority list.  Composting can even be done in a third story walk-up apartment with the new electric composters or even worm bins - the trick is educating people on the balance between vegetable material and brown material such as wood chips, coffee grounds or natural paper.  As long as a balance is kept there is no stench or bug growth.
  Throwing out more than one large kitchen trash bag a week also starts to weigh on my conscience.  Luckily for me in California we have mandatory recycling laws and separate recycling trucks that come around (other parts of the country have similar programs).  I always keep at least 5 brown paper bags (reused from Whole Foods or other grocery stores) sitting around the trash can for paper goods, non CRV plastic/glass/aluminum, a CRV plastic, CRV glass and a CRV aluminum.  California Redemption Value (CRV) is a program that California has that allows you to turn in bottles to a recycler for a cash refund - 5 to 10 cents a bottle.  Yes, sometimes the kitchen can start to look a little like a recycling center but for those of you that have garages or storage rooms those are great places to put your recycling areas.  The clutter of the recycling is less unnerving to my OCD brain than throwing all that away into a landfill - especially when I can make some money from it!
  There are many other ways I always try to be less wasteful all of which help my healthy figure, my electric bill and the planet.  My challenge here is to see how you can think of ways to be less wasteful and to get your family involved as well.  Kids can be doubly influenced by saying they are helping the planet and by giving them any money you save to their piggy banks!

Tuesday, August 2, 2011

World's Best Chicken Stock

This is the main reason I bought a very large and sturdy 12 quart pot.  This recipe is very easy and stock will stay in your freezer for 6 months or more.  By making your own stock you cut out the horrible MSG (now known to be given to lab rats to make them gain lots of weight!) and massive amounts of salt used in store brands. 


Ingredients:
  - 2 (5 lb) roasting chickens (innards removed but neck used)
  - 2 large yellow onions quartered and unpeeled
  - 6 carrots unpeeled and halved
  - 4 stalks celery cut into big chunks with leaves attached
  - 4 parsnips unpeeled and cut in half
  - 20 sprigs fresh parsley (flat leaf)
  - 15 sprigs thyme
  - 20 sprigs dill
  - 1 head of garlic unpeeled and cut in half sideways
  - 2 tbsp kosher salt
  - 2 tsp whole black peppercorns

Add all ingredients to your stock pot and cover with water leaving about an inch above the ingredients but with room for it to simmer without boiling over.  Bring to a boil and reduce heat to a simmer for 4 hours.  Skim any foam that rises to the top - this comes from the skins on the garlic and onions.  Strain out the solids and discard everything but the chicken.  (This can be a messy and painful process with such a heavy pot and hot liquids - I sometimes let things cool before trying to handle this step or use a handled sieve to fish out solids before trying to lift the whole thing.)  Separate the liquid into freezer containers if not using right away.  When it has frozen the fat will have risen to the top and should be easily removed.

Side note:  I got the main body of this recipe from Barefoot Contessa but she throws away all that expensive chicken meat afterwards.  If you take the extra time to separate the chicken from the solids and remove it from the bones and skin it makes awesome pot pies, enchilada meat and in anything else you would use shredded chicken meat. It also freezes well!

This recipe is an excellent way to get your house smelling delicious as well!

Monday, August 1, 2011

They make it so difficult. . .

  After a recent trip back to my parent's home in the Midwest I realized how impossible the industrial food companies have made it to make good healthy eating decisions, without considerable effort.  I was unwilling to part ways, for even 9 days, with my no preservative, no HFCS, no GMO, no industrially produced foods diet.  So in order to continue my eating habits I had to have my parents drive me to the Whole Foods in Tulsa after they picked me up from the airport.  I know there are a lot of Whole Foods haters out there because of the high costs of their products but after reading my previous blog entries we can consider the extra expense a given for healthy eating.  My mother was having a good time at Whole Foods - checking out the herbal medicine section and all the different cheeses and dairy products.  Dad on the other hand was having a very hard time justifying the prices to himself. 
  For those of you that have watched the documentary Food, Inc., there is one very frustrating scene to me and that is the segment on the minority family that tries to buy dinner in a grocery store for the same price as they would through a drive-thru.  The two daughters have a dollar a piece to spend and the youngest asks for some pears but can only buy two and the mother tells her that they are too expensive and it won't fill her up.  This whole dialogue is idiotic to me because when you buy all the raw ingredients to cook a dinner it is almost always cheaper than drive-thru, even when purchasing organic and non-processed ingredients.
  I know that most American families are strapped for time and don't always have the patience to cook full meals every night but it just takes planning.  Lots of people have been asking me how I am going to continue cooking my great food when I start working 40 hours a week plus commuting.  A great deal of what I make doesn't take that much time and I spend a few hours on Sunday planning out the weeks menu, writing a very detailed grocery list (sending myself or hubby to Whole Foods to purchase said items) and prepping anything in advance that can be prepped.  I make a big squeeze bottle of homemade dressing that lasts all week, salads become a main veggie side because I don't have to cook it, steaks on the stove, pre-made shepherd's pie/lasagna/enchiladas/soups that were stored in the freezer for those nights I just don't feel like it, get heated in the oven or on the stove.  I always have tubs of chicken/seafood/beef stock in the freezer for whipping up a quick flavorful soup.  And I always request help after dinner is done cleaning up.
  For those people unfortunate to not live close to a really great farmer's market, Whole Foods store or don't know anyone that raises their own pasture raised cattle and chickens then my biggest advice is to start a garden.  While I was home I noticed that it was impossible to find a bunch of basil in any grocery store which seems so absurd to me.  Basil is one of the easiest plants to grow - it likes humidity and lots of sun and loves to be cut and bugs don't seem too attracted to it.  So do yourself a favor and start a small garden or window box with herbs to start and see where it goes from there.  Just don't use any chemical fertilizer (that includes miracle-gro and osmocote) and don't spray it with insecticide (even organic ones).  Happy planting!

Wednesday, June 29, 2011

Shepherd's Pie

In honor of the recent California crazy weather, apparently the weather gods think it's February and not June, I'm putting up a hearty and cozy dinner that is always a crowd pleaser.  I've made it my goal in life to taste as many different shepherd's pies in as many restaurants as I can and this is about as good as it gets - which is wonderful!

Serves: 4-6 depending on what you serve with it, if anything.
Ingredients:
  - 1/4 cup butter
  - 1 pound chopped beef or lamb
  - 1 cup chopped yellow onions
  - 2 carrots chopped
  - 1 1/2 tsp salt
  - 1 tsp pepper
  - 4 oz button mushrooms, sliced
  - 1 bay leaf
  - 2 tbsp all-purpose flour
  - 1 1/2 tbsp tomato paste
  - 1 1/4 cup beef stock (preferably homemade - I plan on putting my beef stock recipe up sometime and if you wish it b/f hand just message me)
  - 1 tsp worcestshire
  - 1 lb potatoes, peeled and big chopped
  - 1/8 tsp ground nutmeg
  - 1/2 cup heavy cream
  - 1/2 cup freshly grated cheddar

  Lightly grease a 6 cup baking dish.  Melt 2 tbsp butter in very large saute pan over medium-high heat.  Add meat and cook until starting to brown - about 3 min.  Add onions, carrots, 3/4 tsp salt and 1/2 tsp pepper.  Cook stirring for 2 minutes.  Add mushrooms, bay leaf and cook until liquid is almost gone - about 4 minutes.  Add tomato paste, cook for 1 to 2 minutes.  Add flour and cook for 1 minute.  Gradually add stock and worcestshire - bring to a boil.  Reduce the heat and simmer uncovered until thickened - about 20-25 minutes (if mixture still seems a bit runny add a little more flour).  Preheat oven to 400 degrees.  Meanwhile place potatoes in a medium pot and cover with salted water by 1 inch.  Bring to a boil and cook until tender - about 10 minutes.  Drain the potatoes and return to the pot.  Over low heat, mash the potatoes and add the remaining butter, 3/4 tsp salt and 1/2 tsp pepper and nutmeg.  Add the heavy cream and mix well.  Remove from heat.  Remove the bay leaf from the meat mixture and spoon the mixture into the baking dish.  Top with the mashed potatoes (use a light hand here or the potatoes will get pushed below the meat mixture and it should act as the crust on-top).  Sprinkle the potatoes with cheese and bake until browned and bubbly.  About 10 - 15 minutes.  Allow to rest for 10 minutes or more and then spoon onto individual plates.

For a more unique and fun way to serve the pie place the meat and potatoes into individual coquettes and bake for about 10 minutes.  Everyone will then get their own individual coquette.

Ingredients side-note:  I like to add peas into the pie as well, about a 1/2 to whole cup, this should be added when the mushrooms are added for best results.

Monday, June 27, 2011

The chicken that lays the egg. . .

Since it seems that a lot of my recent recipes involve eggs I thought it a great time to discuss eggs in particular.  You have probably heard that pasture raised eggs are more nutritious for you and that is true.  Eggs have gotten a bad rap and that can be blamed on the industrial egg laying process.  Industrial eggs are produced by feeding chickens all that horrible stuff I've discussed before - anti-biotic feed, animal waste, ground up dead animals, corn, etc.  This process produces an egg that is watery, colorless with bad cholesterol.  Pasture raised eggs have "1/3 less cholesterol, 1/4 less saturated fat, 2/3 more Vitamin A, 2 times more Omega-3, 3 times more Vitamin E, 7 times more beta carotene and 4 to 6 times more the Vitamin D."  If that's not reason enough to purchase the slightly more expensive pastured eggs I don't know what is.
  James and I spent several days last week helping our friend build his own chicken coop which will house 24 free-range chickens that lay eggs for his own use and extras to sell to the local bakery (as well as having fresh chicken meat when the layers don't produce as much anymore, about 2 years).  Our friend has been working towards becoming more self-sustainable on his 11 acre lot in Amador county.  He lives in a very rural area and isn't capable of becoming a member of a CSA nor does he like the idea of paying the higher prices for local well-raised food.  It is an added bonus that he will be eating better and getting exercise through raising and tending his own food production.  It is not only the people who live in the city and have access to more amenities that can eat better.  Growing your own food takes less work than most people think.
  With enough room, chickens can forage for up to 70% of their own food - grubs, bugs, plants and worms.  If chickens are raised with other live stock its an even better deal because the chickens act as the clean-up crew after the other animals have come through and left their droppings behind.  Chickens spread the manure, eat the larvae (gaining protein in their diet) and help fertilize the plants.  The only work needed by a person raising chickens is to make sure they have the added feed they need once a day, a supply of water and to harvest the eggs for a few minutes every day.  Raising chickens has become overwhelmingly popular in the last couple years.
  James and I have done our own research into egg nutrition and have been ordering our dozen pasture raised eggs from our CSA in Dixon.  I was amazed with the bright orange colors of the pastured eggs and how much stiffer and less runny they were than the store-bought eggs.  It was my impression that we were probably buying the best and most nutritional eggs we could through our CSA but just a few weeks ago I was proved wrong.  My brother-in-law has started staying with us a few days a week for his work and brings us a dozen eggs from a farm near his house.  This farm is not out to make money they just sell what extra eggs they have that they don't consume themselves.  As soon as I cracked one of those eggs I was even more surprised to find the yolks were almost a neon orange! I devised a taste test and color comparison with our CSA eggs and these eggs.  I made two batches of scrambled eggs - one with our CSA eggs and one with the farmers eggs.  The color difference is pretty astounding but James and I found that the farmers eggs are almost too grassy tasting!

The CSA eggs are on the left and the farmer's eggs are on the right.

Wednesday, June 22, 2011

Eggs in a Basket

This is a recipe I figured out for myself after watching one of my favorite movies.  This breakfast item is featured prominently in V for Vendetta and it looked delicious.  It cuts down on your carbs and combines the runny egg yolk with the crisp toast you were going to use to sop it up anyways.  This meal is my typical weekend breakfast with a cup of hot tea, a large glass of water, fruit on the side and my daily vitamin - it's perfect.

Serves: 1

Ingredients:
  - 1 slice of bread with a 2" diameter hole cut out of it (you can save the hole and toast it in the pan after you cook the egg and spread some jam or preserves on top)
  - 1 pasture raised egg
  - 1/2 tbsp butter
  - salt and pepper

Bring a non-stick skillet to medium-high heat and place half the butter in the pan.  When the butter is melted place the bread in the pan and swirl it around to evenly coat with butter.  Crack the egg into the hole, sprinkle with salt and pepper and let cook for 2-3 minutes until the white is set on the bottom.  Check the bottom of the toast to make sure it is brown and the egg white is cooked  The egg white on top will still be clear and uncooked. Place the remaining butter in the pan around the toast and flip the egg and toast into the butter and cook for another minute until the egg white on top is cooked.  Flip onto a plate and enjoy!

Tip:  Pasture raised eggs are higher in protein and therefore much stiffer and stronger than factory eggs.  When flipping the toast and egg it is very easy to break the yolk with factory eggs but pasture raised eggs are much more forgiving.